Showing posts with label dessert. Show all posts

April 27, 2012

chocolate mousse

This morning I sent the following email to my friend Odette - 

I just ate a pot of chocolate mousse and a piece of chocolate and it's not even noon. 

Oh Talley, get ahold of your self. 

We often chat about chocolate and cake, Odette and I, as it seems we are both drawn to the bitter sweetness of dark chocolate and the soft crumb of a well-made cake. Odette can justify a few extra slivers of chocolate cake after dinner because she is pregnant - due any day now - and as I mentioned previously, chocolate cake is good for babies. I can't blame excessive chocolate eating on pregnancy cravings, but that doesn't mean I don't try and rationalize my consumption. This morning, whilst spooning airy chocolate mousse into my mouth, I thought the following...

Mousse is made with eggs and eggs are a breakfast food so it's okay to be eating mousse before noon...maybe it should only be eaten before noon...and it has coffee in it and coffee was made for mornings...so mousse with coffee is a morning meal...so what that the eggs and coffee swimming in chocolate?...it's like a chocolate mocha with eggnog and people drink those for breakfast (even though I've never heard of a mocha with eggnog)...and it's in a yogurt pot and yogurt is eaten for breakfast and so what if it's not actually yogurt...it's a really special mousse and I should eat it before it goes bad...

And so it continued until I had spooned all of the mousse out of the little blue ceramic pot and into my mouth, where it melted with a sigh, unleashing note of coffee before disappearing in a smooth chocolate swallow. If you didn't know to watch for it you might miss the coffee flavor all together, it is the secret ingredient, adding just enough richness to the chocolate without overpowering it. 
I stopped drinking coffee a little while ago. It reminded me too much of architecture school, where if I ever found myself without a cup I ran out to get one. It was part of the uniform, right along with the color black. I think we used the cardboard cups as props, something to occupy our hands - and hide behind- while we desperately tried to defend our design decisions, which were inevitably being torn apart by a critic, a critic who was gesturing wildly and using a coffee cup as a pointer. 

The highlight of architecture school and my requisite coffee drinking was a class trip to Rome the summer before my final year. Have you ever stood at the counter of an Italian caffè? Ordering a caffè in italy is an entirely different experience. First you order and pay the cashier, then you take your receipt to the counter, shoving your way to the front, and hand the receipt to the barista, who whips around, places the grinds in the metal filter, mounts the filter on the machine, and quickly the espresso pours into a tiny white porcelain cup. The cup is then placed on an equally miniature saucer and both are passed to you at the counter, where you are expected to stay while you drink it. It is a quick process, just a sip, and it’s gone. There are no long watery American coffees to be seen, just short, smooth, black, ristrettos. They are enough to woo you back to Italy.

And so even though I had semi-given up coffee when we were in Apulia I partook, walking up to the counter, leaning slightly over the edge and ordering due caffè, per favore. I also learned that you don’t need to be in a city to drink a great espresso, you can be in the middle of nowhere, at a gas station along the side of the road from Lecce to Otranto, or in the tiny hill little town of Locorotondo. It will be good, you will think it was the best you’ve ever had, until you pull up to the next counter. 

I came back to Zürich desperate for that smooth Italian caffè. We have a Nespresso machine (thanks Sandy & Katie!) so I marched right into Nespresso and up to the saleswoman and asked if they had anything that tasted like the coffee I had had in Italy. She responded with ‘so you want it very strong?’ I didn’t realize it was strong at the time because it didn’t taste at all bitter, which is the taste I associate with strong, so I said ‘I guess so’ and she sold me two boxes of their strongest pods, and home I went.
For the past few weeks, since before Easter, there has been a life-size chocolate bunny sitting across the kitchen from the Nespresso machine. I swear to you that they have been making eyes at each other since I first put them in the same room. And then of course all Easter bunnies need eggs, and chocolate + coffee + eggs = chocolate mousse. 
Just before I sat down to write this I ate the last two pots of mousse. Well, really, I ate one pot and then I stared bleakly into the empty pot, made a pouty face, and then Zach gave me the rest of his pot, and I ate it, and then proceeded to make another pouty face. This mousse is amazing. It is light, and airy, and fluffy, and smooth, and simple, and (I wish I had another word) delicious. I hope you make it.

As David Lebovitz notes in his book before this mousse recipe, the recipe relies on raw eggs. GASP! but you see, not really. Europeans don't panic about raw eggs, at all. If you go looking for the eggs in the refrigerated section of the grocery store, you wont' find them there, because they aren't refrigerated. They are stacked neatly on a shelf near the cool dairy items, but not with them. This initially terrified me. I avoided buying eggs for weeks, if not months. What about salmonella? I learned that after an egg is laid it has an inherent bacteria fighter built in, that keeps the egg safe for roughly two weeks. That same thing that keeps it safe on the shelf keeps it safe in your food, allowing you to make yummy chocolate mousse with raw egg. The eggs here in Zürich are dated with their lay date and expiration date. I also try to buy my eggs at the farmers market where I can assure they are local and fresh. I've eaten about 4 mousse pots, so that is a little over two raw eggs and I'm feeling better than ever...currently rationalizing...I really do feel good...maybe I should make more mouse...raw egg agrees with me...I feel energetic...and my hair is extra shiny...and I'm extra focused...must be the mousse...

// chocolate mousse //

* David Lebovitz suggests using Chartreuse liquor or espresso
** the little pots are optional, you can also make on larger batch
*** I just made these again (May 6, 2012) and I used a stronger espresso and it is a bit too strong. Use a mild espresso or even a lungo (more like an americano) or even a strong american drip coffee. 

ingredients
 225 g // 7 oz bittersweet or semisweet chocolate, finely chopped
45 ml // 3 tablespoons water
30 ml // 2 tablespoons mild espresso or strong coffee (see note above)
4 large eggs at room temperature, separated
pinch of salt. 

In a double boiler, or a bowl set over barely simmering water, begin melting the chocolate, water and espresso. Stir occasionally, making sure the mixture doesn't get too hot, and remove from heat just as it begins to looks smooth. Continue stirring until all of the chocolate has melted and the mixture smooth. Set the bowl aside. 

Whip the egg whites with the salt in the bowl of a standing mixer fitted with a whisk attachment. Beat until stiff peaks form and the mixture looks creamy. 

Stir the egg yolks into the chocolate mixture. Then fold one third of the egg whites in, incorporating until no white streaks are visible. Follow with the remaining egg whites until fully incorporated. 

Pour the mousse into 4-6 ramekins (or one big bowl), cover with plastic wrap and refrigerate for at least three hours or overnight. The mousse will keep in the fridge for five days or in the freezer for one month. 

April 17, 2012

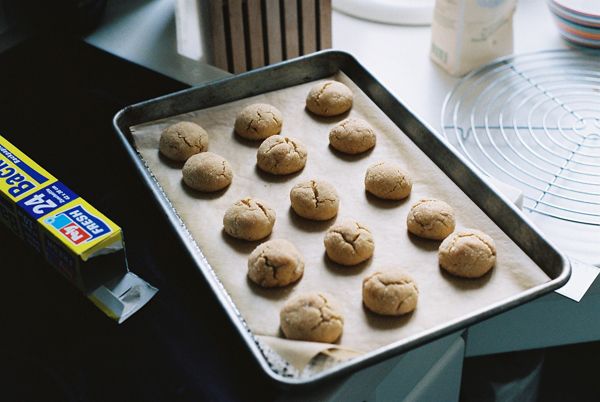
grotto and pistachio cookies

If you've ever driven a Smart Car on an Italian highway then you can understand why we took the slow, albeit scenic route on our drive from Lecce to Otranto.

Really it was a combination of things that lead us to this place. It was raining. Lecce had been a disappointment. Our afternoon was free, except for an obligation to a bag of pistachio cookies. Overall we just had a feeling that something was missing, that there was more to be discovered, maybe ruins of an ancient civilization or a seaside town not scared by tourist shots or perhaps a view to behold.

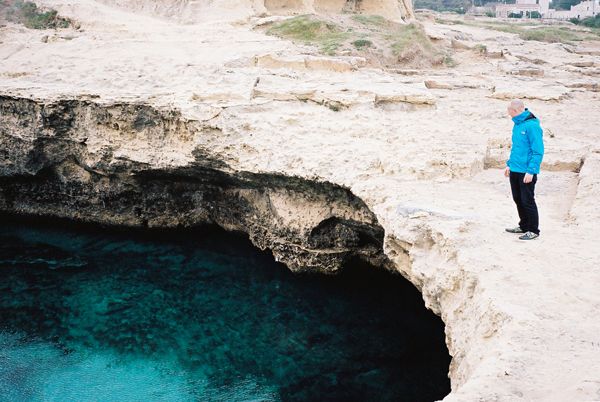
It turned out to be the latter, and we almost didn't stop. There was a crumbling fortress that we both did a double take of, but we kept driving and only after we had rounded the bend did we look at each other and say "let's stop". There was nothing, no sign or billboard, to indicate that there might be something worth seeing, but we pulled over anyway and got out of the car.

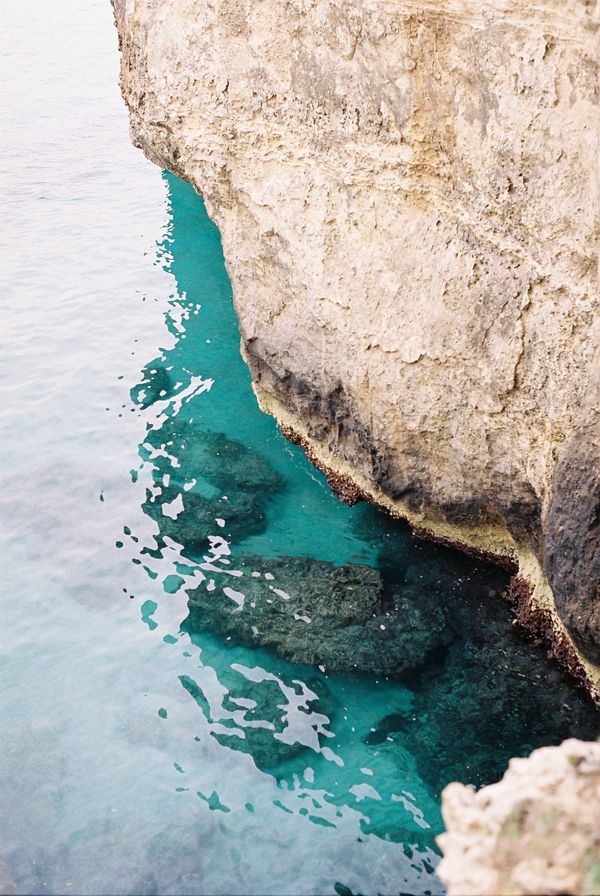
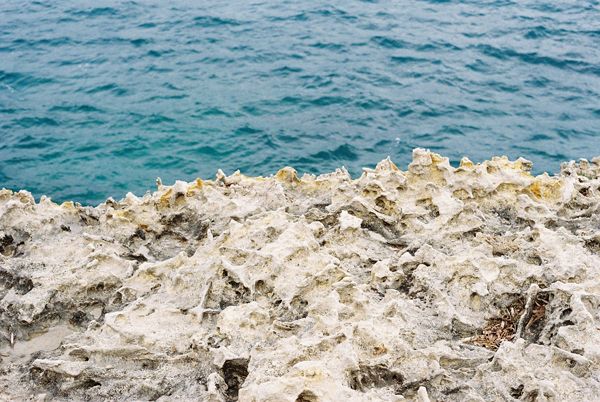
First we saw the turquoise water, lapping underneath the rock face. It was beautiful. I took some pictures. Then we saw fractures, from the surface we were walking on down to the water beneath us, which were sensational. I took more pictures. Then, as we approached the edge, we saw this grotto.
I didn't even take any pictures right away. We simply stared for a while and then proceeded to walk around the pool. Stairs had been carved in the rock and we walked down and put our feet in the crisp and clear water. I was half expecting to see a sea turtle or two. From the carved graffiti it was clear that this is a popular summer swimming spot, but for us, there during the low season, it was hidden gem, something we discovered.

It is those moments away from your guidebooks and to-see lists that can really define a trip and make it yours.

I am guilty of over-planning trips, eager to make sure we see and do everything that is recommended. I run us around until we are hungry and defeated. Having nothing planned and just going with the flow is great in theory, but it often stresses me out, that feeling that we might miss something. We often say that when we visit a city for the second time, when we are free from seeing the sites, we will stay in one neighborhood for the whole visit, that way by the time we leave we will know which bakery has the best breakfast and which café is perfect for an afternoon with a book and which old lady sitting on the stoop we need to say hi to and which we need to avoid. You know, the little things that give definition to a place.
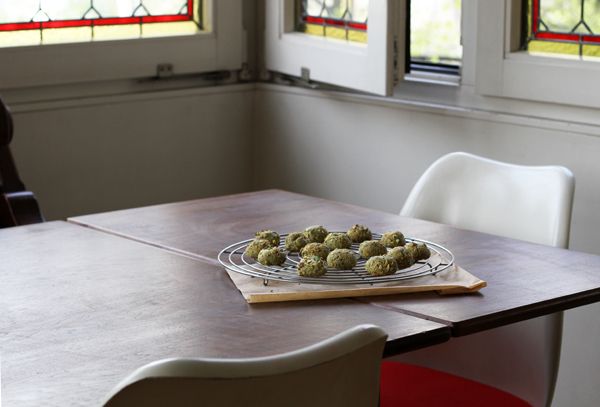
After we tore ourselves away from the pools and the cliffs we spent the rest of the day looking at the countryside through raindrops and windshield wipers. We got out briefly in Otranto, but again, we were disappointed and didn't stay long. At that point we turned around and headed North back to our hotel. Keeping us company on the long drive back were our excitement about stumbling upon the turquoise pools and that bag full of pistachio cookies. I guess you could say it was a little bit of luck and a little bit of guidance, because the cookies were from a bakery in Lecce that was mentioned in our guide book. Curious about the local treats I made sure we stopped in our way out of town. Zach picked out a cream filled cake and I chose the pistachio cookies. The cookies were nutty, dense, delicious, and surprisingly satisfying. The cookie was composed of a light crumb outer layer and a dense gooey inside, similar to a macaroon, but heartier.

/ / / pistachio cookie / / /

Almond trees are a fixture in the Apulian landscape, so almonds and almond flour are a common ingredient in regional confections. In Switzerland almond flour can be found at Coop or Migro and in the states I believe you can buy it at Whole Foods, if not other large grocery stores. I generally process the almond meal I buy, making sure it's fine and not coarse. I used roasted shelled pistachios that I shelled and processed in a coffee bean grinder (time to buy a food processor).

I fussed with this recipe until after three separate batches it finally felt right. The cookies aren't as sweet as the originals, but for me that is a good thing, because now you get little hints of their salty roasted nut beginnings.

makes about 18 cookies

ingredients
80 g / 2.8 oz finely ground pistachios nuts
100 g / 3.5 oz almond flour
110 g / 3.9 oz fine sugar
50 g / 1.75 oz sifted confectioner sugar
35 g / 1.25 oz egg white (about 1 egg)
chopped pistachio nuts for rolling (optional)

Preheat the oven to 350ºF/180ºC.

Mix the nut flours and sugar in a bowl. Pour about 1/3 of this nut mixture into the bowl of your standing mixer. Add the egg white and mix until incorporated. While keeping the mixer on continue to slowly add the rest of your nut mixture, allowing the egg mixture to absorb the dry mix before adding more. The dough should be reasonably smooth. If it is sticky add a bit more almond flour.
Using a teaspoon scoop out the dough and roll into balls between the palms of your hands, aiming for about 18-19 cookies. At this point you can chop pistachio nuts to roll the cookies in, or you can leave them plain. Place the cookies on a baking sheet and bake on the middle rack of your oven for about 15-17 minutes. Let the cookies cool completely on a wire wrack before eating. When cool the inside should still be fairy dense and pasty. mmmmm, yum


March 27, 2012

dark and decadent

Dear Dark and Decadent Chocolate Cake,

This was not a good hiding spot.

No, not a good hiding spot at all. You quickly morphed from a loaf into a sliver and I think it's fair to say that you can blame that on your inability to hide, from me. Yes, this is a two person household, but it only took one to finish (and start) you off. We would have made a good magic act - Aabra Ka Daabra, pop, pow, (chew - swallow), vanish. Next time you're going in the cupboard, out of plain site, at least during snack time. And let's be honest, it's always snack time, so you best get cozy between those random canned goods on the top shelf.
oh and by the way, in case you feel slighted, you should know...
I LOVE YOU!

your darling dearest,
Talley

This cake is similar to the raspberry flourless chocolate cake I made back around Thanksgiving, however, it's much smaller and thus doesn't demand a celebration, just a typical Monday night will do. It is amazingly dense, so much so that you can cut the thinest sliver and it won't break into crumbs. I know because I ate this cake by the 1/4 inch sliver, and that was a lot of slivers.

I made it on a Monday and it was gone, poof, by Friday. Zach helped a tiiiiny bit and so did my friend Jess, but mostly it was just me and the cake, mano-a-mano. I ate it for a snack, I ate it as an hors d'oeuvre, I ate it for dessert, I ate it for lunch and I ate it for breakfast. This cake succumbs to no social pressures or rules about when it is okay to eat cake. Just eat it when ever you feel like it, which will pretty much be all the time.

Oh and did I mention, it's super easy to make?

Gateua Therese
David Leibovitz - The Sweet Life in Paris

* The woman who gave David Leibovitz this recipe recommended that you make it two days ahead of when you want to serve it, that it improves the flavor. I have no idea how anyone waits that long, but I do remember the cake getting better with age...as I ate it...sliver by sliver

- 9 oz / 250g bittersweet or semisweet chocolate
- 8 tablespoons/115g unsalted butter
- 1/3 cup of sugar
- 4 large eggs, at room temperature, separated
- 2 tablespoons flour
- pinch of salt

Preheat then oven to 350ºF/180ºC. Butter a 9inch/23cm loaf pan and line the bottom with a strip of parchment paper.

In a double boiler, or bowl set over a pot of simmering water, melt the chocolate and butter together until smooth.

Remove from heat and stir in half of the sugar, the egg yolks and flour

Using a mixer, beat the egg whites and salt until soft peaks begin to form. Beat in the rest of the sugar and whip until the whites are smooth and hold their shape.

Use a rubber spatula to fold 1/3 of the egg whites until the chocolate mix. Once incorporated fold in the remaining egg whites just until the mixture is smooth and no white streaks are visible.

Scrape the batter into the loaf pan and bake for 35 minutes until the cake feels slightly firm in the center. Do not overbake (i take mine out at exactly 35 min). Let the cake cool in the pan. It will collapse, don't worry, it is supposed to, that's what makes it fudgy and gooey. Let it cool to room temperature before serving.

I had to escape the kitchen and the cake and so I went for a variety of long walks last week. The weather here has been beautiful, as I hear it has been a lot of other places as well. I'm sure all this March sunshine means it will snow in July, which just means I'll have to go to Southern Spain in July - no big deal.

Did I mention that this cake could easily be considered fudge. I mean look at that gooey middle! So decadent and dark and delicious. Oy! So delicious that I've made this cake three times in the last week. I'm not kidding. The first one was for me, and then I made another for Laura and Sam, and I just pulled one out of the oven a few minutes ago so I can bring it to book club tonight. This is one of those cakes that needs to be shared, and loved, and devoured.
cake and tulips and sunshine - last week was a good week!

March 20, 2012

awe and wonder

A lot of posts have been about adventures or discoveries, and others strictly about recipes or the atmosphere, but this post, this teeny tiny magical post, is about a feeling. I haven't pinned down what that feeling is exactly, perhaps it's more of an aura than a feeling anyway, but I'd have to say it's along the lines of awe and wonder (and those might be the same thing, but they bring up different emotions so for now let's just say they are different).

I think it's important that we start from the beginning, the beginning of our journey as expats. Being an expat is a truly unique experience, out of the realm of moving to a different city in your home country or traveling abroad for a semester. When you begin life as an expat you are starting from scratch, from just you and your husband and a city that you've never visited before and an apartment that you can't quite envision. This is your life, this is where you begin, without friends, without a clue, but with a whole lot of unknowns.

My biggest concern was that we wouldn't have friends. In my whole life I've never just up and moved somewhere where I didn't know a soul. 'Home' is the place I have lived sine I was two years old. I went to grade school then to high school and then to college and finally to graduate school and along that journey there were always familiar faces. And then we moved to Switzerland, just us, just me and Zach, no friends and no familiar faces. Just us. It took a little while and a bunch of first friend dates, but now we have a truly wonderful group of friends.
They are our friends, but they are also our family - our Zürich family.

If you've been/are an expat then you can understand this type of family. In some ways it was automatic, we were all reaching for the same thing, a friendship we could hold on to, a friendship that would calm the uncertainties and highlight the excitements of life as an expat.

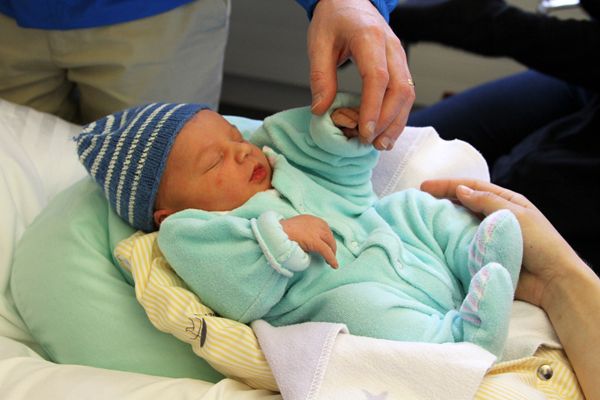
And to think we've only known them for six months! These are the friends we spent Thanksgiving with and the friends that delivered take-out (no such thing as delivery in Zürich) when I was sick. These are also the friends that we were lucky enough to visit in the hospital just one day after they welcomed their little baby boy, Sam.

And that is where all that awe and wonder come in!

She has a baby. I mean I knew it was coming. As long as I've known her, Laura was pregnant. He was in there the whole time. But now he's out here. He is here. He was in and now he is out (this is where I begin to state the obvious, but I can't help it - awe and wonder people, awe and wonder). Isn't it amazing?

Perhaps all of this awe and wonder hit me like a freight train moving at warp speed because Laura was (he is out, he is here, incredible) the first pregnant woman I had spent a good amount of time with. I knew she was growing, I knew he was coming (obviously, he had to arrive at some point), but now he is here, and I have held him in my arms, because he is here to be held.
There simply aren't words, just an aura composed of awe and wonder and a whole lot of other magical feelings. Magical feelings that make a nonbeliever believe, believe in big lofty intangible things.

But with all of this happiness I can't help but think that this time and this Zürich family of ours is fleeting. One of the key components of expat life is the reality that this is just temporary, whether it be two, five or ten years, we will all eventually go back home. Of course as some go, others will arrive, but someday, probably shortly after he turns one and a half, Sam will leave. That little boy I held in my arms at just one day old will be able to walk onto the plane with his favorite stuffed animal in hand and fly away. Magical.

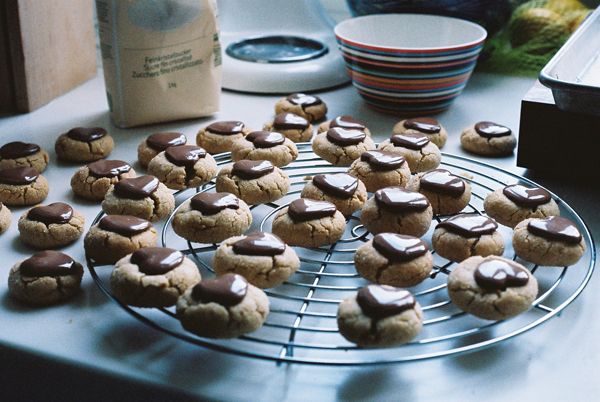
The hours between when Sam arrived and when we were able to visit him were long. I was so excited I could barely see straight. So I baked Laura and Paul some cookies. It's a recipe I learned from Laura around Christmas time (Sam was there) and it's "bangin" as Laura would say. These cookies thrive on the marriage of peanut butter and chocolate. And considering I don't think there is a better combo out there, not even mint and chocolate, I adore these cookies and their soft chewy texture with the chocolate plopped on top.
Sam's Peanut Butter Blossoms
makes about 4 dozen.

ingredients
- 1/2 cup (113g) unsalted butter at room temperature
- 3/4 cup (185g) peanut butter, smooth or chunky (if you are in switzerland Migros makes a much better peanut butter than Coop)
- 1/3 cup (70g) light brown sugar
- 1/3 cup (70g) granulated white sugar
- 1 large egg
- 1 teaspoon pure vanilla extract
- 2 tablespoons milk
- 1 1/2 cups (195g) all purpose flour
- 1 teaspoon baking soda
- 1/4 teaspoon salt

- granulated sugar for coating
- chocolate pieces for topping - I used hearts but hersey's kisses are the standard.


With an electric mixer or hand mixer cream the butter until smooth and creamy. Add the peanut butter and sugars and continue beating until light and fluffy. Follow with the egg and vanilla. Beat in the milk.

In a separate bowl whisk together the flour, baking soda, and salt. Add to the butter mixture and beat until incorporated. Place the cookie dough in the fridge for an hour or until hard enough to roll into balls.

Preheat the oven to 375ºF (190ºC)

Roll the batter into 1inch (2.5cm) round balls. Place the granulated sugar in a small bowl and roll each ball lightly in the sugar, coating the outside. Place on a baking sheet, spacing about 2inches (5cm) apart.

Bake the cookies for about 8-10 minutes, or until the cookies are lightly browned. Right after you take them out of the oven put the chocolate piece on top of each cookie, pressing down gently until the cookie just starts to crack. Let the cookies cool completely on a wire wrack (you want the chocolate to re-solidify)

March 09, 2012

girls dinner & dessert

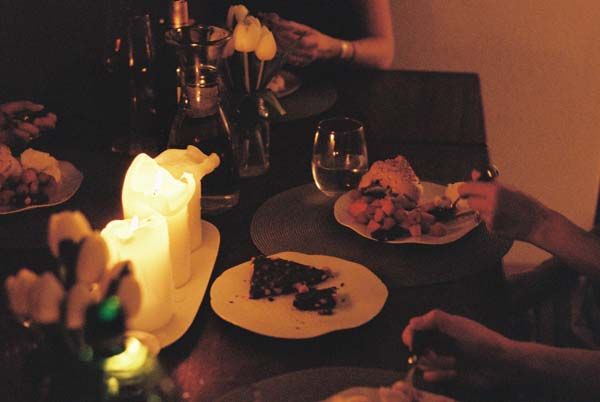
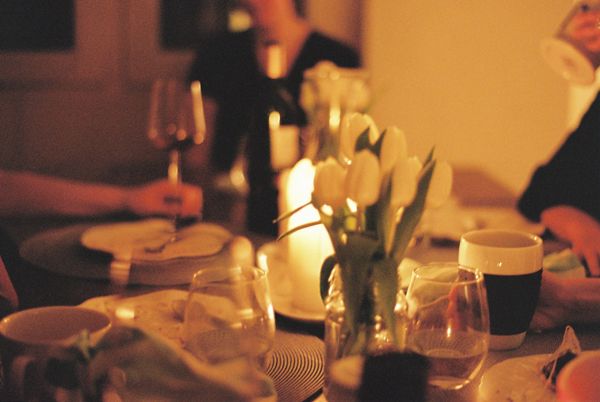
Does hosting a dinner party make you nervous? If so, then I think you and I should start a support group called 'I'm a nervous freaking hostess.' I love the idea of hosting a dinner party, but then when it actually comes time to consider possible menu options I freeze up, panic, and call off the whole idea. What is it about having people over that sets of the panic alarm? These are my friends, they aren't going to judge me if the salmon is slightly overcooked or if I don't have six matching sets of silverware, or if the apartment is a little bit dark because I still can't get my act together, or my German, to call the electrician. And heck, I cook dinner almost every night, and generally make enough food for leftovers, so what's the difference in adding a bit more and inviting a few friends to join us?

As I see it, the major dinner party issues are
1) what to cook
2) the timing of everything your cooking so that it all finishes cooking at the same time
3) how to be a good hostess while also managing the kitchen, which ultimately comes back to #1 & #2

Anyway, this week I composed my panicked self, made way too many to-do lists, and invited five friends over for dinner. Zach was in Miami all week for work, so I took his absence as an opportunity to have a girls dinner. These are my nearest and dearest friends here and I still made-lists and a time line for what to cook when. I constantly need to remind myself that when I am the guest I am just happy to be out, in someone else's home, surrounded by good friends, so much so that I certainly don't question what they are serving. Heck, serve me up some spaghetti with tomato sauce and I'll be a happy dinner guest.

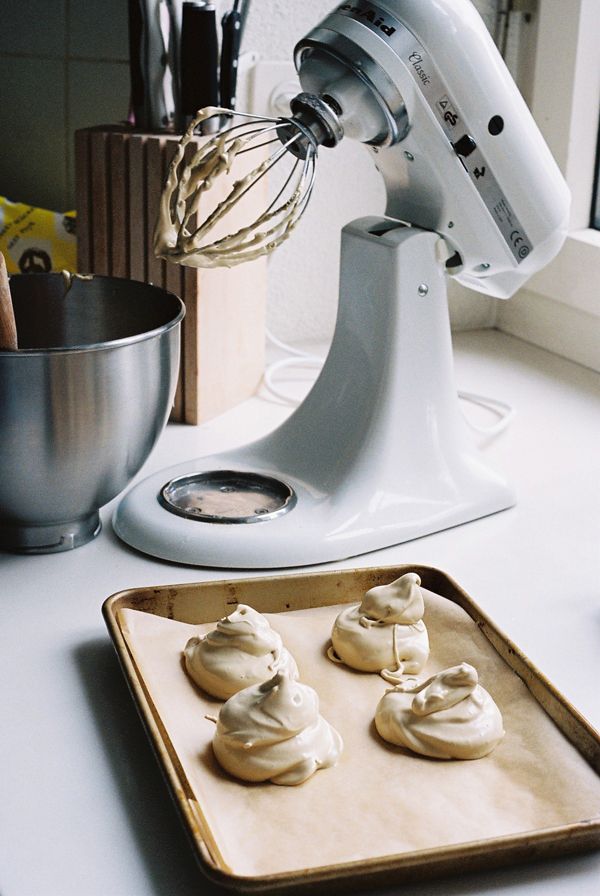
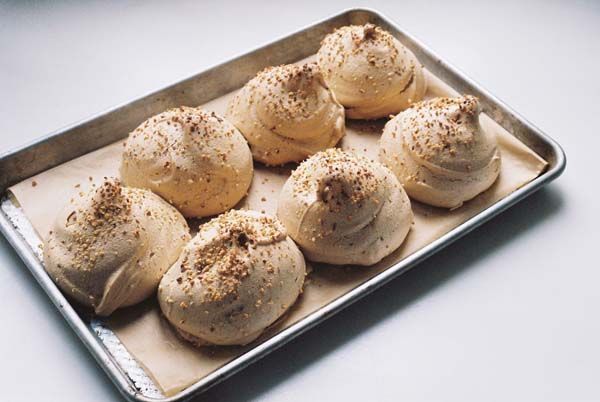
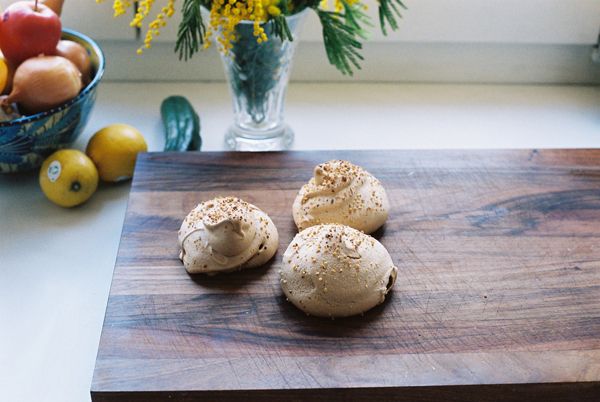
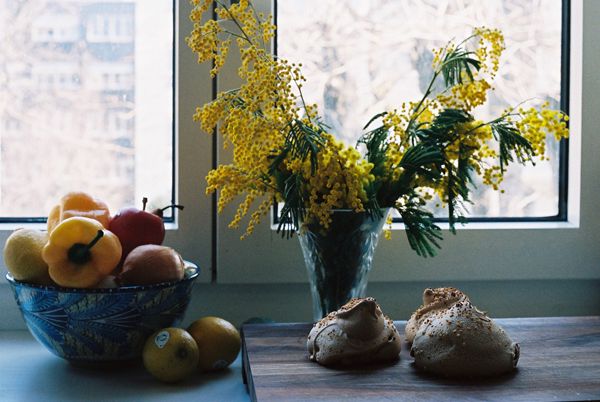
Spaghetti and tomato sauce and dessert, that will be my go-to dinner party menu. I love thinking about and making desserts for a crowd. If the spaghetti doesn't appeal to you, then well good, because you'll have more room to eat dessert. I was debating between two desserts for this little fête; that decadent chocolate cake from Thanksgiving, and coffee flavored meringues with ice cream and fruit. As you can see from the picture, I chose the meringue. It just seemed appropriate for a girls dinner, a light little treat after a savory dinner.
I had never made meringues before and so I was a bit intimidated and concerned that I wouldn't know when my egg whites were 'peaky' enough or when the batter silky enough, but it all came together with ease, so much so that this recipe will go on my 'quick & easy dessert' list. The color of the batter after adding the sugar and espresso was beautiful; the creamy white of an oyster silk wedding dress. These would actually make a wonderful dessert at a wedding, perhaps a wedding where the bride and groom were tired of cutting cakes or a wedding at which either the bride or groom is gluten-free.
Coffee Meringues
Nigella Lawson, Nigella's Kitchen: Recipes from the Heart of the Home

meringues
makes 8-10

- 4 egg whites
- 1 cup superfine sugar
- 1/3 cup (packed) light brown sugar
- 2 teaspoons instant espresso powder
- pinch of cream of tartar (I didn't have any so didn't use it and as it turned out, didn't need to)
- chopped hazelnuts for sprinkling on top (optional)

Preheat the oven to 275ºF/135ºC

Combine the superfine sugar, brown sugar and espresso powder and cream of tartar if using. If the mixture is at all clumpy (mine was) use a sieve to get out the lumps.

Whisk the egg whites in a grease free bowl (I used my kitchen-aid mixer with the whisk attachment). Whisk until they are beyond foamy and soft peaks have started to form. You should be able to lift the whisk out of the bowl and leave behind peaks that stand on their own. Once you've gotten to that point you are ready to add in the sugar mixture. While continuing to whisk add 1 tablespoon of the sugar mixture at a time until you have added all of it and the meringue is shiny and the color of oyster silk.

Line a lipped baking sheet with parchment paper. Spoon out the meringue into large dollops, about 2 heaping soup spoonfuls, to give roughly 2 inch diameter meringues, aiming to create 8-10 (I had 11) in total. Using the backside of a spoon or a spatula, pull the meringues upwards as you go, giving them height and that meringue 'sweep'. Sprinkle the meringues with some of the chopped hazelnuts.

Place the meringues in the oven for about 40-45 minutes, until they are dry on the outside, but still gooey in the middle. They should be fragile to the touch. Take them out of the oven but do not remove them from the baking sheet. Once the meringues and the baking sheet have cooled to room temperature, remove them and pair them with some ice cream and fruit and enjoy!

* these are a great dinner party dessert because they can be made up to the night before and stored in an airtight container. I made them the morning of and just left them on the counter. They were delicious and a bit hit!
Don't worry, I didn't default to spaghetti and tomato sauce this time around, and we didn't just eat dessert. I was able to gather my wits about me and cook a sensible and yummy dinner. One of my favorite chicken recipes was the star the meal, but the accompaniments of polenta, green beans and a salad with Ali's tarragon-shallot dressing were all yummy, and relatively easy to make.

Chicken Marbella is a wonderful dish for a dinner party, because all you need to do is marinate it for as long as you can, ideally overnight, and then transfer it to a baking dish and stick it in the oven for an hour. Polenta is an especially apt side to chicken marbella, because it sops up all of the leftover sauce and takes on the flavor of cooked prunes and olives. Polenta can be a bit hard to time, but I recommend making it a couple of hours before you plan on serving it and when it is done, transfer it to a double boiler (with a top or plastic wrap), and it will remain soft for up to a few hours and will be ready to serve when you are. Green beans are a bit tough considering they only take a few minutes to make, but those few minutes are right before you want to eat them, so they pull you back into the kitchen and away from your chatting guests, but only for a minute. And then the salad...easy to wash and prep and make the dressing while the polenta is cooking. This tarragon dressing adds a little something extra to your basic oil and vinegar dressing, which is perfect for a dinner party.
Now that I've shared some dinner party ideas with you, hopefully making your next party a breeze, you could share some with me? I'm always eager to hear about dinner party go-tos, especially if those dishes can be cooked in my mini-Euro oven (I actually measured it the other day, its about 16" x 16.5").

In the end I realized there was absolutely no need to get worked up about dinner...but then again, maybe if I hadn't, it would have been a flop. Either way we had a really nice evening, full of chatter from Jessica Simpson (did you see this) to Rush Limbaugh and all of those crazy 'sluts' who take birth control (if you haven't watched the John Stewart segment on the Rush issue then I highly recommend it - click the 'sluts' link).

shönes Wochenende (nice weekend) !

February 24, 2012

Frühling Financiers

Frühling kommt! That means 'spring is coming'. My German classes are slowly beginning to pay off, although I will admit that I used google translate just to make sure I had gotten that right. I guess confidence will come with time and a lot more practice. Anyway, the deep freeze seems to be over, thank goodness, and it's actually warm-ish out (when you have a deep freeze, anything over freezing is considered warm, but today it's actually 50º). I was beginning to think I'd never go outside again, that my pom-pom hat would be a wardrobe stable forever and that I'd never wear sandals again. Alas, I can feel the sun on my face, and it feels heavenly. The deep freeze seemed to have hit the blog as well, so my apologies if you were visiting in the hopes of finding some Haus warmth and goodies.

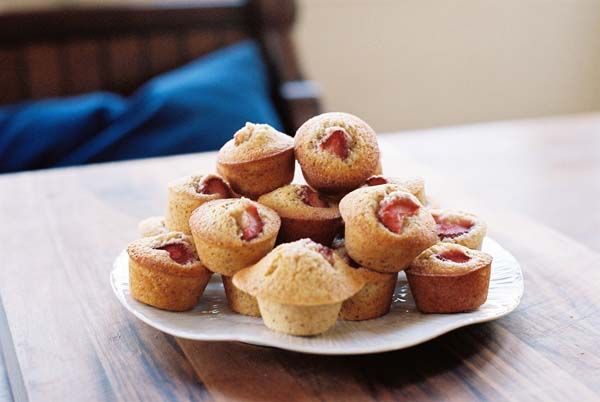
I've had this financier recipe on my 'to-bake' list ever since we got back from our trip to Paris. We went to the boulangeries to buy baguettes, but it's impossible to just by baguettes, so we often left with other goodies, like pain au chocolat, brioche, madeleines, and financiers. All weekend there were goodies spilling out of my purse and thankfully there were some delicious treats hidden in the bottom of my purse that I didn't discover until we were already back in Zürich on Sunday night. Hidden in that little brown bag were two madeleines and three financiers. I sampled both for breakfast on Monday, and although both were worthy of a return trip to Paris, the financier really caught my attention. The perfectly crisp exterior gave way to a moist and flavorful almond interior and I knew after the first bite that I had to find a worthy recipe that I could make at home.
Here are the authentic Parisian madeline and financier. I'm surprised they made it all the way back to Zürich. I think we were so stuffed after a weekend of delicacies and baguettes that by the time Sunday night came around we were unenthused by any baked goods.
Almond Financiers with Strawberries
Recipe adapted from Epicurious

* My one suggestion is to weigh the ingredients. A cup of almond flour is not an accurate measurement as some flours can be lighter or denser than others.

* I don't have financier molds so I used mini cupcake molds.

ingredients
- 2 tablespoons unsalted butter for buttering financier molds
- 1 cup (140g) finely ground almonds
- 1 2/3 cup (210g) confectioners sugar
- 1/2 cup (70g) all purpose flour
- pinch of salt
- 3/4 cup (185g) egg whites (5 to 6)
- 3/4 cup (185g/6oz) unsalted butter melted and cooled
- sliced strawberries for top

Preheat oven to 450ºF/230ºC

Using a pastry brush thoroughly butter the molds. Place the molds or cupcake tin in the freezer to resolidify the butter, which will make it easier to unmold the financiers.

In a large bowl combine the almonds, sugar, flour, and salt. Mix to blend. Add the egg whites, mixing until blended. Follow with the 3/4 cup butter and continue to stir/mix until incorporated. The mixture should be fairly thin and pourable.

Spoon the batter into the molds, filling them almost to the rim. Top each with a strawberry slice or two. Place the molds/cupcake tin on a baking sheet and place in the oven. Bake until the financiers just begin to rise (about 7 min) then reduce the heat to 400ºF/205ºC. Continue baking until the financiers are a light, delicate brown and begin to firm up (another 7 min). Turn off the oven heat and let the financiers rest in the oven until firm (another 7 minutes). Timing might be less depending on your mold/tin - just be sure to check for rise-browning. Mine were about 5-6 minutes instead of 7.

Remove the financiers from the oven and allow them to cool in their molds for 10 minutes. Enjoy for breakfast or with your afternoon coffee!
In our house these were a breakfast treat, but they would be great at any time of the day. These were so good, actually one of Zach's favorites, that I think I will keep them on a fairly steady rotation, and will certainly make a batch when we have guests.
Hopefully this post marks the end of the blog freeze. It's time to start browsing cookbooks and revisiting my 'to-bake' list. With spring approaching I'm feeling the need for a little less baking and a bit more spinach, so perhaps I'll finally get my act together and post some lunch/dinner recipes (always harder to photograph).