Showing posts with label chocolate. Show all posts

April 27, 2012

chocolate mousse

This morning I sent the following email to my friend Odette - 

I just ate a pot of chocolate mousse and a piece of chocolate and it's not even noon. 

Oh Talley, get ahold of your self. 

We often chat about chocolate and cake, Odette and I, as it seems we are both drawn to the bitter sweetness of dark chocolate and the soft crumb of a well-made cake. Odette can justify a few extra slivers of chocolate cake after dinner because she is pregnant - due any day now - and as I mentioned previously, chocolate cake is good for babies. I can't blame excessive chocolate eating on pregnancy cravings, but that doesn't mean I don't try and rationalize my consumption. This morning, whilst spooning airy chocolate mousse into my mouth, I thought the following...

Mousse is made with eggs and eggs are a breakfast food so it's okay to be eating mousse before noon...maybe it should only be eaten before noon...and it has coffee in it and coffee was made for mornings...so mousse with coffee is a morning meal...so what that the eggs and coffee swimming in chocolate?...it's like a chocolate mocha with eggnog and people drink those for breakfast (even though I've never heard of a mocha with eggnog)...and it's in a yogurt pot and yogurt is eaten for breakfast and so what if it's not actually yogurt...it's a really special mousse and I should eat it before it goes bad...

And so it continued until I had spooned all of the mousse out of the little blue ceramic pot and into my mouth, where it melted with a sigh, unleashing note of coffee before disappearing in a smooth chocolate swallow. If you didn't know to watch for it you might miss the coffee flavor all together, it is the secret ingredient, adding just enough richness to the chocolate without overpowering it. 
I stopped drinking coffee a little while ago. It reminded me too much of architecture school, where if I ever found myself without a cup I ran out to get one. It was part of the uniform, right along with the color black. I think we used the cardboard cups as props, something to occupy our hands - and hide behind- while we desperately tried to defend our design decisions, which were inevitably being torn apart by a critic, a critic who was gesturing wildly and using a coffee cup as a pointer. 

The highlight of architecture school and my requisite coffee drinking was a class trip to Rome the summer before my final year. Have you ever stood at the counter of an Italian caffè? Ordering a caffè in italy is an entirely different experience. First you order and pay the cashier, then you take your receipt to the counter, shoving your way to the front, and hand the receipt to the barista, who whips around, places the grinds in the metal filter, mounts the filter on the machine, and quickly the espresso pours into a tiny white porcelain cup. The cup is then placed on an equally miniature saucer and both are passed to you at the counter, where you are expected to stay while you drink it. It is a quick process, just a sip, and it’s gone. There are no long watery American coffees to be seen, just short, smooth, black, ristrettos. They are enough to woo you back to Italy.

And so even though I had semi-given up coffee when we were in Apulia I partook, walking up to the counter, leaning slightly over the edge and ordering due caffè, per favore. I also learned that you don’t need to be in a city to drink a great espresso, you can be in the middle of nowhere, at a gas station along the side of the road from Lecce to Otranto, or in the tiny hill little town of Locorotondo. It will be good, you will think it was the best you’ve ever had, until you pull up to the next counter. 

I came back to Zürich desperate for that smooth Italian caffè. We have a Nespresso machine (thanks Sandy & Katie!) so I marched right into Nespresso and up to the saleswoman and asked if they had anything that tasted like the coffee I had had in Italy. She responded with ‘so you want it very strong?’ I didn’t realize it was strong at the time because it didn’t taste at all bitter, which is the taste I associate with strong, so I said ‘I guess so’ and she sold me two boxes of their strongest pods, and home I went.
For the past few weeks, since before Easter, there has been a life-size chocolate bunny sitting across the kitchen from the Nespresso machine. I swear to you that they have been making eyes at each other since I first put them in the same room. And then of course all Easter bunnies need eggs, and chocolate + coffee + eggs = chocolate mousse. 
Just before I sat down to write this I ate the last two pots of mousse. Well, really, I ate one pot and then I stared bleakly into the empty pot, made a pouty face, and then Zach gave me the rest of his pot, and I ate it, and then proceeded to make another pouty face. This mousse is amazing. It is light, and airy, and fluffy, and smooth, and simple, and (I wish I had another word) delicious. I hope you make it.

As David Lebovitz notes in his book before this mousse recipe, the recipe relies on raw eggs. GASP! but you see, not really. Europeans don't panic about raw eggs, at all. If you go looking for the eggs in the refrigerated section of the grocery store, you wont' find them there, because they aren't refrigerated. They are stacked neatly on a shelf near the cool dairy items, but not with them. This initially terrified me. I avoided buying eggs for weeks, if not months. What about salmonella? I learned that after an egg is laid it has an inherent bacteria fighter built in, that keeps the egg safe for roughly two weeks. That same thing that keeps it safe on the shelf keeps it safe in your food, allowing you to make yummy chocolate mousse with raw egg. The eggs here in Zürich are dated with their lay date and expiration date. I also try to buy my eggs at the farmers market where I can assure they are local and fresh. I've eaten about 4 mousse pots, so that is a little over two raw eggs and I'm feeling better than ever...currently rationalizing...I really do feel good...maybe I should make more mouse...raw egg agrees with me...I feel energetic...and my hair is extra shiny...and I'm extra focused...must be the mousse...

// chocolate mousse //

* David Lebovitz suggests using Chartreuse liquor or espresso
** the little pots are optional, you can also make on larger batch
*** I just made these again (May 6, 2012) and I used a stronger espresso and it is a bit too strong. Use a mild espresso or even a lungo (more like an americano) or even a strong american drip coffee. 

ingredients
 225 g // 7 oz bittersweet or semisweet chocolate, finely chopped
45 ml // 3 tablespoons water
30 ml // 2 tablespoons mild espresso or strong coffee (see note above)
4 large eggs at room temperature, separated
pinch of salt. 

In a double boiler, or a bowl set over barely simmering water, begin melting the chocolate, water and espresso. Stir occasionally, making sure the mixture doesn't get too hot, and remove from heat just as it begins to looks smooth. Continue stirring until all of the chocolate has melted and the mixture smooth. Set the bowl aside. 

Whip the egg whites with the salt in the bowl of a standing mixer fitted with a whisk attachment. Beat until stiff peaks form and the mixture looks creamy. 

Stir the egg yolks into the chocolate mixture. Then fold one third of the egg whites in, incorporating until no white streaks are visible. Follow with the remaining egg whites until fully incorporated. 

Pour the mousse into 4-6 ramekins (or one big bowl), cover with plastic wrap and refrigerate for at least three hours or overnight. The mousse will keep in the fridge for five days or in the freezer for one month. 

April 13, 2012

chocolate baby shower

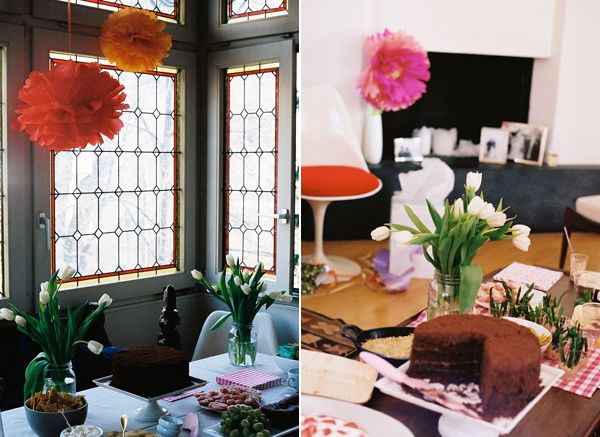
I read somewhere that pregnant women who eat chocolate have calm, well-tempered, easily pleased babies. With that sound piece of scientific research I went ahead and made Tartine's Devil's Food Cake for a little shower I hosted in honor of my dear friend Odette. Odette who is due in a matter of weeks (this whole baby thing continues to amaze me). With a 'better-safe-than-sorry' attitude, I figured it was probably wise that she eat as much chocolate as possible in the hopes of an even sweeter little baby girl.

On the topic of little girls, when I was a little girl I hated chocolate. I know. I hated chocolate cake and chocolate ice cream and chocolate bars. My favorite ice cream flavor was, and still is, strawberry, and I loved yellow cakes with vanilla frosting (have you had yellow cake recently? so good) and my favorite candy was anything of the gummi variety. Oh how things change. Now I love chocolate, so much so that I have to will myself not to eat it. Today, Sunday, is currently day two of a no chocolate stint, started after I ate an entire box of chocolate that I picked up at the Salon du Chocolat in Zürich. An entire box of little chocolate prailines, nutty chocolate slivers and orange crinkle chocolate thingys. I'd like to think that anyone in my situation (I mean you saw those chocolates right?) would have done the same thing, but I bet some of you out there have slightly more self restraint than me.

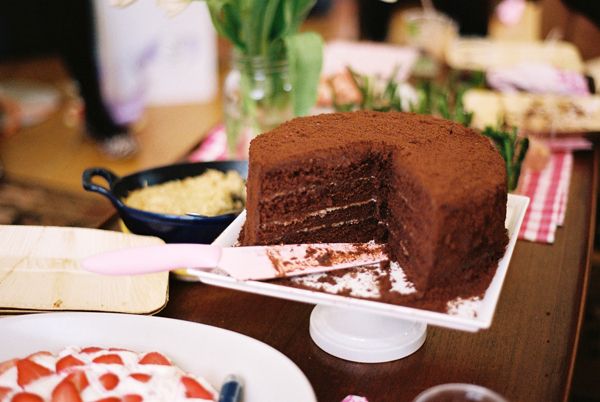
But I doubt you'd have enough self restraint not to have a couple of slices of this cake. Somehow this cake is more chocolatey than a plain bar of chocolate, and richer too. It could be described as chocolate covered in chocolate and caramel and sprinkled with more chocolate. The cake itself is perfectly moist and just dense enough to maintain a sensation of melted chocolate. It's not a cake you make on a whim because it takes some time and effort to make the separate components and then bring them all together, but I don't think you'd want this to be a whim cake, it is a special occasion cake. And whats more special than a new baby girl on the way?
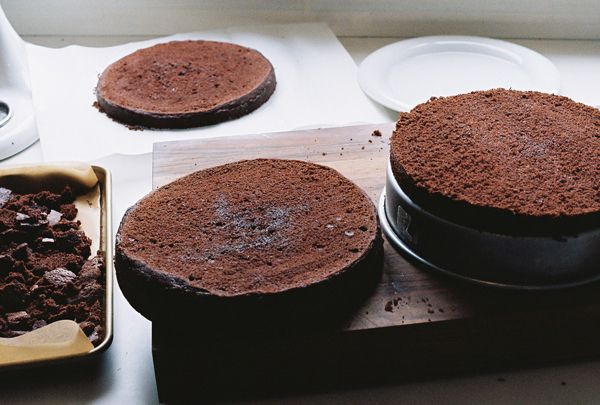
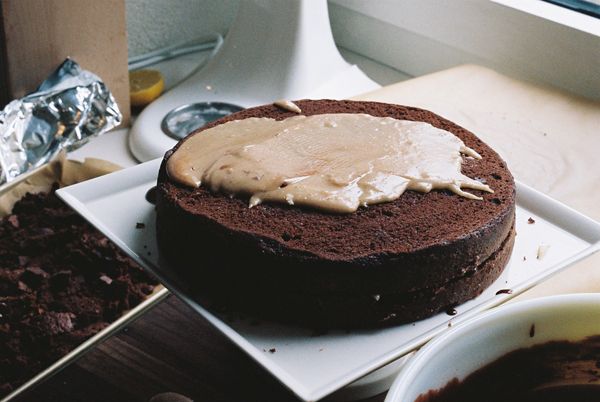
The domes of the cake are saved to make the crumb topping. I must have eaten about 1/4 of the broken up domes (sitting there on the cookie sheet to left in the photo). The cake was still slightly warm and the little pieces tasted so much like brownie bites. As I sat there munching away I contemplated a 'Devil's Food Cake' ice cream - yum!
Over each layer you spread caramel and then chocolate ganache before topping with another cake layer. At the end you cover the whole thing in chocolate ganache (before covering with ganache I surrounded the cake with parchment paper to catch the drips and drabs, of which there were lots).

Devil's Food Layer Cake
Tartine

*this is a fairly involved process so give yourself some time. It's worth it!
** I have given instructions for dressing the cake with the toasted cake crumbs. Tartine notes that you should make more ganache if you chose to skip the toasted crumb topping, but I found that I had plenty of extra ganache so I think you can stick to the recipe below even if you don't want to top with crumbs.
*** I have no idea how to keep this process clean. My cake was super messy, just go with it

cake ingredients
1 3/4 cup // 250 g all purpose flour
4 1/2 tbsp // 60 ml cornstarch
1 tsp // 5 ml baking powder
1/2 tsp // 2 ml baking soda
1 1/4 cup // 115 g cocoa powder
1 tsp // 5 ml salt
1 cup // 225 g unsalted butter
2 3/4 cup // 570g sugar
5 large eggs
1 1/4 cup // 310 ml buttermilk

chocolate ganache ingredients
24 oz // 680 g
3 cups // 750 ml heavy cream

caramel ingredients
2/3 cup // 150 ml heavy cream
1/4 vanilla bean
1 1/4 cup // 240 g sugar
1/4 cup // 60 ml water
1/4 tsp // 1 ml salt
2 tbsp // 30 ml light corn syrup
3/4 tsp // 4 ml lemon juice
4 tbsp // 55 g unsalted butter

the cake
Preheat the oven to 350ºF//180ºC. Butter two 9" cake pans and dust with flour, knocking out the excess. Cut a piece of parchment for the bottom of each pan - this will make getting the cake out much easier.

Sift the flour, cornstarch, baking powder, baking soda, cocoa powder and salt into a bowl and set aside. In a mixer fitted with a paddle attachment beat the butter until light and creamy and then slowly add the sugar continuing to beat until light in color and fluffy. Add the eggs one at a time, mixing until each is incorporated before adding the next. With the mixer on low, add the flour in 3 batches, alternating with the buttermilk. Stop and scrape down the side of the bowl every once and awhile.

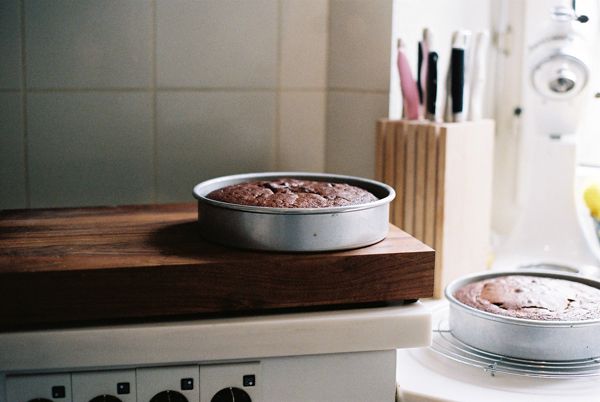
Divide the cake batter between the prepared pans. Bake for about 45 minutes or until a cake tester comes out clean and the top of the cake springs back when lightly touched. Let the cakes cool completely on a wire wrack.

chocolate ganache
While the cakes are cooling you can make the ganache. Place the chocolate in a heat proof bowl. In a separate pan heat the cream until just under a boil. Pour the cream over the chocolate and let it sit for a minute or two before stirring, allowing the cream to melt the chocolate. Stir until smooth, light, and shiny.

let the ganache come to room temperature, or even a little cooler before trying to ice the cake.

caramel
Pour the cream in one sauce pan. Split the vanilla bean and scrap the seeds into the cream. Bring to just under a boil over medium heat, stirring occasionally. Reduce the heat to low to keep the cream warm

In a second heavy bottomed saucepan, combine the sugar, water, salt and corn syrup. Bring to a boil over medium heat, stirring to dissolve the sugar. Once dissolved stop stirring and cook until the mixture is amber colored, 5-8 minutes. Remove from heat.

Quickly, but carefully add the cream in a slow stream to the sugar mixture. The mixture will bubble furiously at first, so let it calm down before stirring. Whisk until smooth. Add lemon juice and cool for about 10 minutes.
assembly
Set the oven to 250ºF//121ºC. When the cakes have cooled turn them out of their pans. With a serrated knife slice off the domed portion of each cake, to make the top of each cake flat. The domes will be your cake crumb topping so place them on a parchment lined cookie sheet. Break up the cake domes. Place in the oven and bake for about an hour or until the crumbs are dry. Let cool and then process with a food processor until finely ground.

Slice each cake into two layers, so that you have 4 layers in all. Place one layer on your chosen serving plater. Spread 3 tablespoons of caramel evenly over the layer. Spread a thin layer of ganache, about 1/4 inch thick, over the caramel. Top with a cake layer. Repeat for layer 2 and 3. When you top with the final 4th layer you do not need to add caramel. At this stage refrigerate the cake for about 1-2 hours until the center seems firm and it's not slipping all over the place. Cover the ganache with plastic wrap and leave at room temperature.

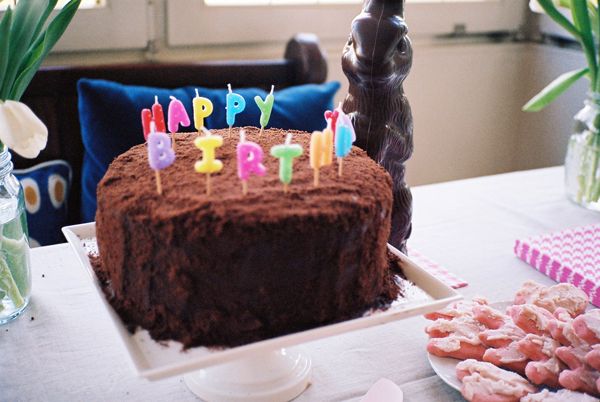
Remove the cake from the fridge and use the rest of the ganache to ice the top and sides. In order for the crumbs to adhere the ganache needs to be soft. (you can use a hairdryer to soften things up if your cake/ganache has hardened). Sprinkle the crumbs evenly over the top and sides of the cake. The sides were challenging, I had to use my hands to catapult crumbs onto the side and then flatten them into the ganache.

Serve the cake at room temperature. You do not need to refrigerate the cake.
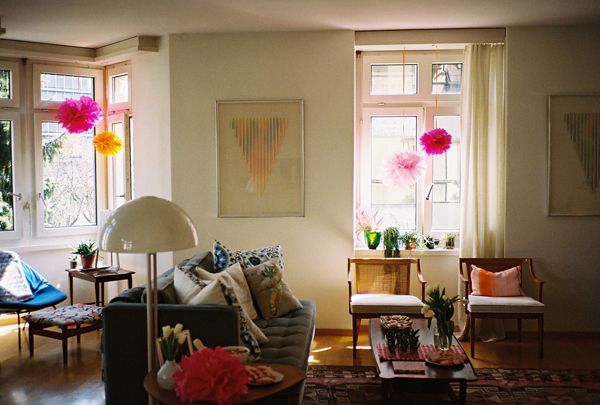
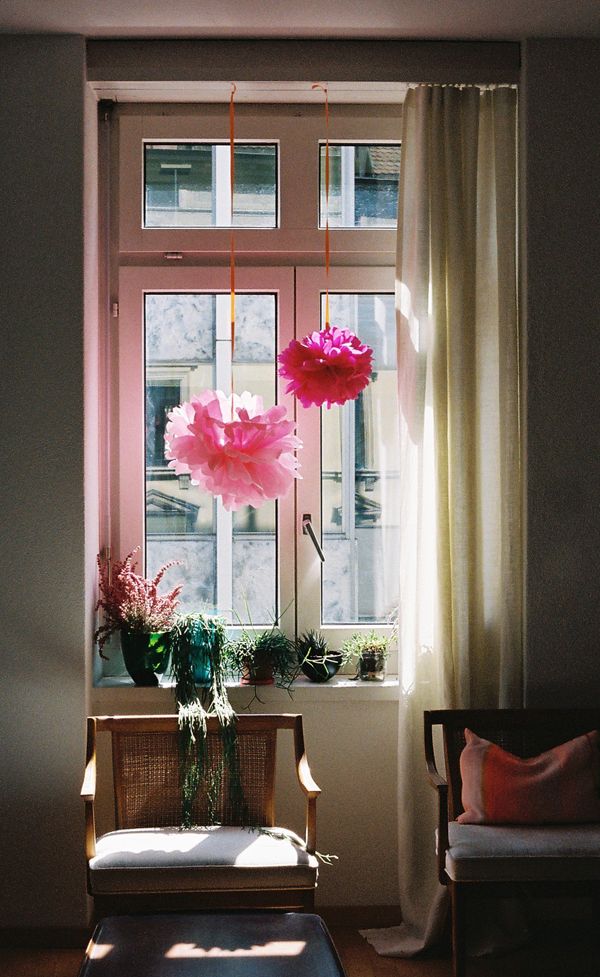
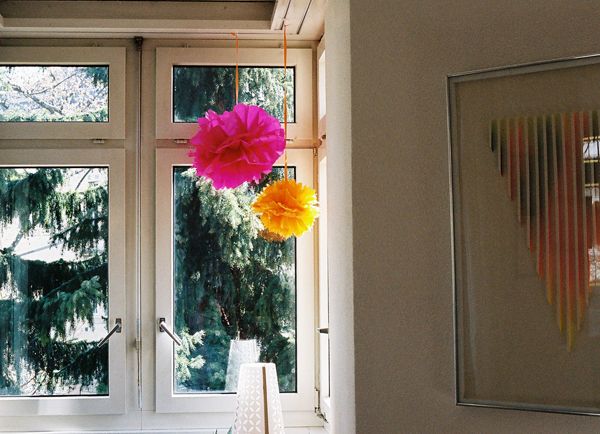
We had fun pom-pomming the apartment. Martha Stewart is always there when you need her for an idea.
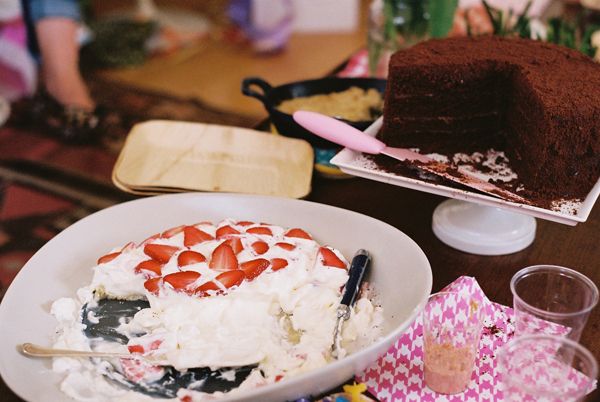
It was Katie's birthday so the cake doubled as a birthday cake, but don't worry there were plenty of shower-spefic goodies. We made scones, iced cakey cookies, lemon cake, another chocolate cake, a strawberry tart, chocolate birds nests with marzipan eggs, fig-ricotta crostinis, fennel and bean dip and just for good measure, a fruit salad.

Oh, and that life size chocolate bunny is currently sitting by my stove waiting to be turned into some sort of cake, or cookie, or mousse.
It was a wonderful shower and you can be sure that all of the food was enjoyed. The leftover cake found homes outside of my kitchen (thank goodness) and word make it back to me that husbands and kids and friends loved the cake too.
This is the chocolate bunny that kept us company at the dinner table. While we were away the bunny melted and we returned to a bunny with no back or tail.

Speaking of our trip....I'm planning on looking at the photos tonight so hopefully there will be a post soon.

March 27, 2012

dark and decadent

Dear Dark and Decadent Chocolate Cake,

This was not a good hiding spot.

No, not a good hiding spot at all. You quickly morphed from a loaf into a sliver and I think it's fair to say that you can blame that on your inability to hide, from me. Yes, this is a two person household, but it only took one to finish (and start) you off. We would have made a good magic act - Aabra Ka Daabra, pop, pow, (chew - swallow), vanish. Next time you're going in the cupboard, out of plain site, at least during snack time. And let's be honest, it's always snack time, so you best get cozy between those random canned goods on the top shelf.
oh and by the way, in case you feel slighted, you should know...
I LOVE YOU!

your darling dearest,
Talley

This cake is similar to the raspberry flourless chocolate cake I made back around Thanksgiving, however, it's much smaller and thus doesn't demand a celebration, just a typical Monday night will do. It is amazingly dense, so much so that you can cut the thinest sliver and it won't break into crumbs. I know because I ate this cake by the 1/4 inch sliver, and that was a lot of slivers.

I made it on a Monday and it was gone, poof, by Friday. Zach helped a tiiiiny bit and so did my friend Jess, but mostly it was just me and the cake, mano-a-mano. I ate it for a snack, I ate it as an hors d'oeuvre, I ate it for dessert, I ate it for lunch and I ate it for breakfast. This cake succumbs to no social pressures or rules about when it is okay to eat cake. Just eat it when ever you feel like it, which will pretty much be all the time.

Oh and did I mention, it's super easy to make?

Gateua Therese
David Leibovitz - The Sweet Life in Paris

* The woman who gave David Leibovitz this recipe recommended that you make it two days ahead of when you want to serve it, that it improves the flavor. I have no idea how anyone waits that long, but I do remember the cake getting better with age...as I ate it...sliver by sliver

- 9 oz / 250g bittersweet or semisweet chocolate
- 8 tablespoons/115g unsalted butter
- 1/3 cup of sugar
- 4 large eggs, at room temperature, separated
- 2 tablespoons flour
- pinch of salt

Preheat then oven to 350ºF/180ºC. Butter a 9inch/23cm loaf pan and line the bottom with a strip of parchment paper.

In a double boiler, or bowl set over a pot of simmering water, melt the chocolate and butter together until smooth.

Remove from heat and stir in half of the sugar, the egg yolks and flour

Using a mixer, beat the egg whites and salt until soft peaks begin to form. Beat in the rest of the sugar and whip until the whites are smooth and hold their shape.

Use a rubber spatula to fold 1/3 of the egg whites until the chocolate mix. Once incorporated fold in the remaining egg whites just until the mixture is smooth and no white streaks are visible.

Scrape the batter into the loaf pan and bake for 35 minutes until the cake feels slightly firm in the center. Do not overbake (i take mine out at exactly 35 min). Let the cake cool in the pan. It will collapse, don't worry, it is supposed to, that's what makes it fudgy and gooey. Let it cool to room temperature before serving.

I had to escape the kitchen and the cake and so I went for a variety of long walks last week. The weather here has been beautiful, as I hear it has been a lot of other places as well. I'm sure all this March sunshine means it will snow in July, which just means I'll have to go to Southern Spain in July - no big deal.

Did I mention that this cake could easily be considered fudge. I mean look at that gooey middle! So decadent and dark and delicious. Oy! So delicious that I've made this cake three times in the last week. I'm not kidding. The first one was for me, and then I made another for Laura and Sam, and I just pulled one out of the oven a few minutes ago so I can bring it to book club tonight. This is one of those cakes that needs to be shared, and loved, and devoured.
cake and tulips and sunshine - last week was a good week!

December 09, 2011

christmas cookie

For as long as I can remember my mom has made Aunt Julie's sugar cookies. The key to Aunt Julie's cookies is to roll the dough really thin, as thin as you can, and then bake until just golden around the edges and sprinkle with sugar while they are still hot. They are superb cookies. At least we like to think so. We trade them amongst the family--my aunt Sarah will make some, pile them in a tin, wrap it with ribbon and gift it to my dad and my mom will make some and pile them in a tin, wrap it with ribbon and give it to my grandmother--they are family heirlooms that we make and eat every year at Christmas.

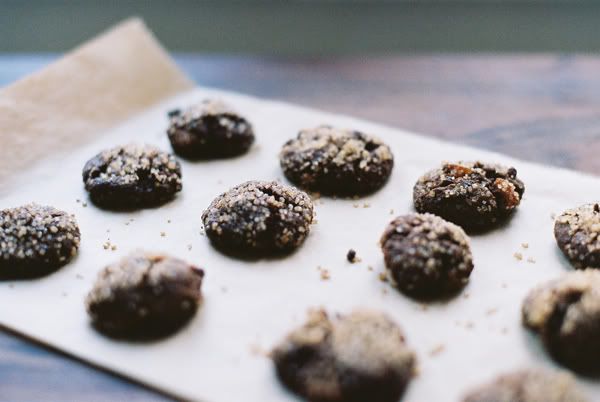
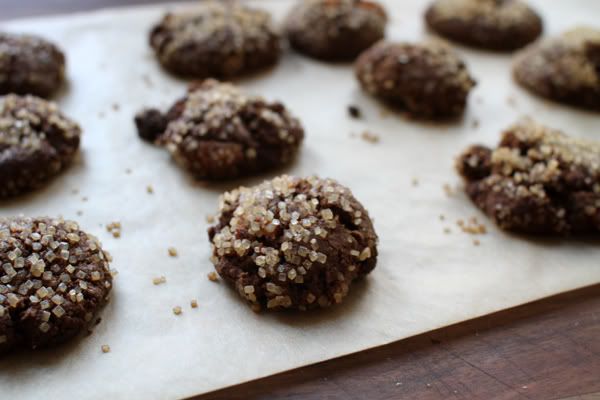
So as you can see these aren't Aunt Julie's cookies. It's just that it's not quite time for crisp sugar cookies. They are timed for the arrival of reindeer on rooftops. In the meantime I decided to make a different type of twinkling cookie, a molasses ginger cookie. This recipe is from Heidi Swanson's Super Natural Everyday. I was struck by the dark cookie with the chunky demerara sugar shell. These cookies are a wonderful mix of sweet outer crunch and chewy flavorful cookie. The molasses flavor runs deep, through the chocolate, the apricot and the ginger, which all act as punctuations to the long meandering molasses sentence.

So about the molasses. Expats will often do crazy things to find some semblance of home , like spending $12 dollars on a small jar of molasses. It's just the way things go here. You want it, you need it, and you finally found it hidden on the bottom shelf so you buy it. But as so often is true, the product just doesn't live up to your expectations: the molasses I bought was too strong, which I learned sampling a cookie from the first batch. I adjusted for the second batch, substituting dark muscovado sugar for a good chunk of the molasses, hoping that the molasses in the muscovado would shine through, and it did, wonderfully.
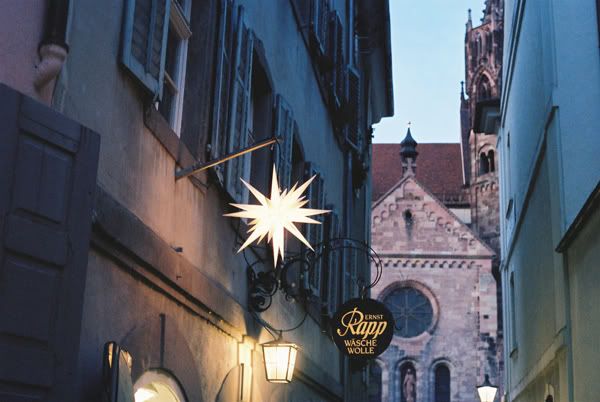
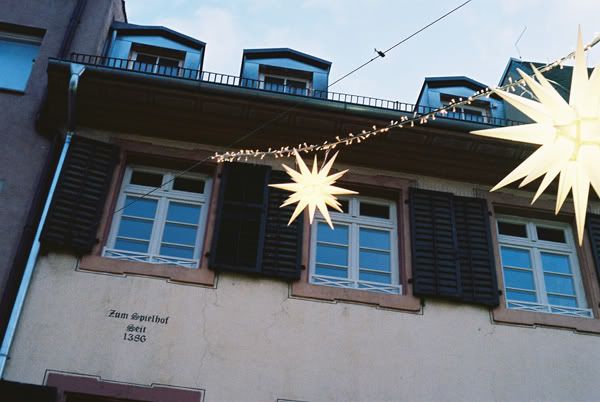
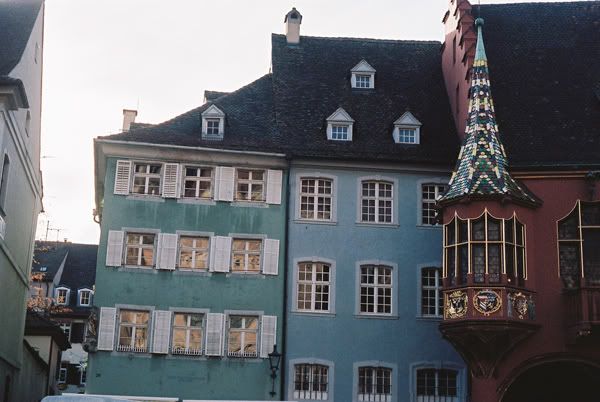
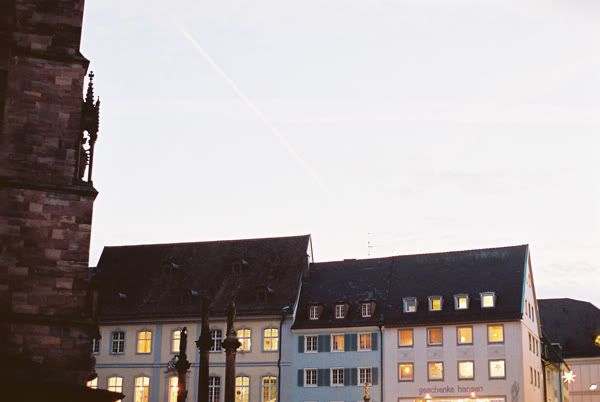
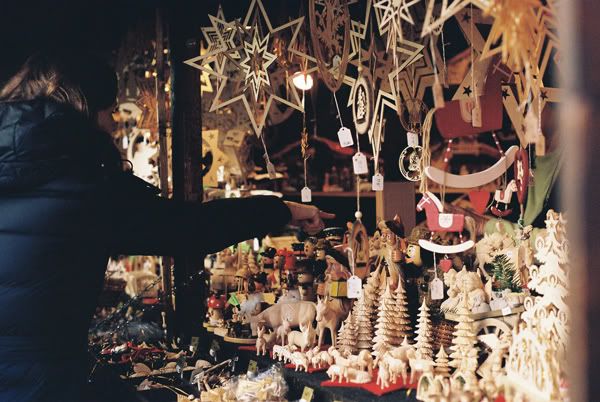
These pictures are from a recent trip to Freiburg, Germany, for the Christmas markets. Christmas markets are ever present this time of year. Little wooden huts are set up in rows, evergreen garlands are hung from the roofs, and lights are strung from hut to hut. It's wonderfully festive, seemingly homegrown and super duper charming. These little elf villages, as I like to think of them, spring up all over Switzerland, Germany, Austria and Eastern France, and while the wares might be a bit repetitive and sometimes hokey it's always a treat to walk through them. On this trip I spent more money on food - bratwurst, cookies, glühwein - than I did on Christmas goodies, but the food still put me in the Christmas spirit!
Ginger Cookies
adapted from Heidi Swanson, Super Natural Everyday

*note: I had to adapt the original recipe because the molasses I found here was very strong. I substituted some of the molasses with dark muscovado sugar. If you live in the states, you can go with the original (1/4 cup molasses) but be sure the molasses tastes good, not harsh, before using.

- 1/2 cup / 70g demerara sugar
- 6oz / 170g bittersweet chocolate (64%) chopped into chip size pieces
- 2 cups / 230g spelt flour (dinkelvolkohrmehl) or whole wheat pastry flour and I think all purpose flour would be fine as well
- 1 tsp baking soda
- 1 1/2 tbsp ground ginger
- 1/2 tsp salt
- 1/2 cup / 115 g unsalted butter, cut into small cubes
- 3 tsp unsulphured molasses
- 3 tbsp dark muscovado sugar
- 2/3 cup / 100 g fine grain natural cane sugar
- 1 large egg, well beaten
- 1 cup plump dried apricots, minced (after measuring)

Preheat the oven to 350ºF/180ºC and line a baking sheet with parchment paper

In a large bowl whisk together the flour, baking soda, ground ginger and salt.

Heat the butter in a small saucepan until just barely melted. Stir in the molasses, dark muscovado sugar. The mixture should be warm, but not hot. If it is hot to the touch, let it cool until just warm. Once cool whisk in the egg. Pour this mixture over the flour mixture and add the chopped apricots and chocolate and then stir until just combined. Chill the dough for about 30 minutes, until the dough has firmed up a bit.

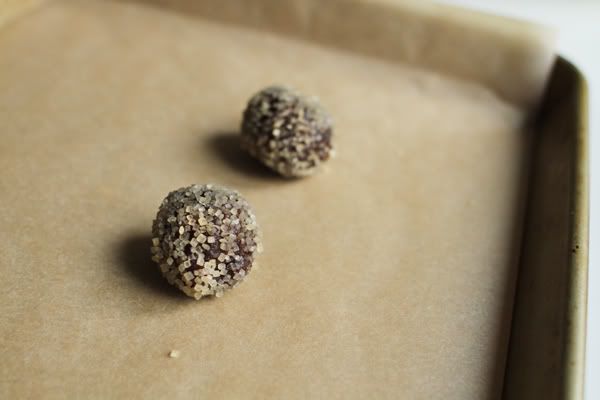
Pour some of the demerara sugar into a bowl. Use a tablespoon to scoop the dough, split that tablespoon into two smaller pieces, and roll each into a ball. Roll each ball in the bowl of demeara sugar, using pressure if needed to make the sugar stick to the dough.

Place the cookies on the baking sheets a few inches a part. Bake for about 7 – 10 minutes until the cookies puff up, darken a bit and crack. Cool on a wire wrack.

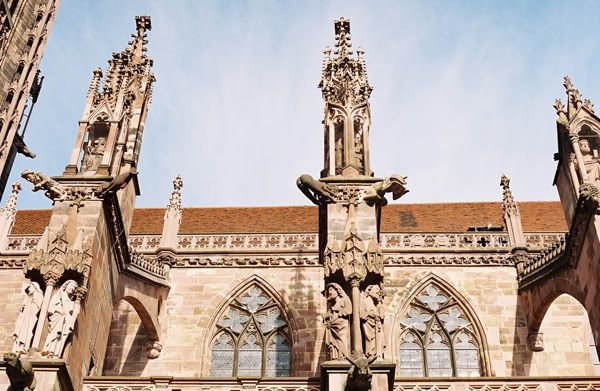
And a little something funny for your Friday...look closely at this photo, at the center buttress (no pun intended, but perhaps it will give you a hit of what to look for)....at the gargoyles. Do you see what I see? The gargoyle on the left on the center buttress is facing the wrong way! Its butt is sticking out, towards us, and between the cheeks is a rain spout, so when it rains, water pours out of this gargoyles butt. seriously?! medieval humor?

On that note I hope you have a wonderful, glittering, weekend. And not to worry, I will post Aunt Julie's cookies soon!

December 01, 2011

flourless chocolate cake...with raspberries

This cake brings good tidings, to you and you and you and me. I imagine, writing this only a week after I made it, that I will always remember this cake. I will remember it because it is amazingly rich and fudgy and spotted with raspberry sweetness, but also because it was the cake that marked the end of our first Thanksgiving abroad. A Thanksgiving that also happened to be the first one that Zach and I spent together. There was no need to discuss whose family we would grace with our presence because we simply couldn't get back to the states for the holiday. Instead, we spent Thanksgiving with what we consider to be our new family, the group of friends we have made here in Zürich. And it was wonderful.

In truth we had two Thanksgivings, one on Thursday and one on Saturday, and both were wonderfully festive, full of laughter, gratitude and a lot of stuffing.
Behold the magic ingredient, nine eggs. Yes nine. Nine yolks whipped into the creamed butter and then nine whites, beaten into stiff white peaks, and folded into the chocolatey batter.

Our first Thanksgiving on Thursday, where this cake made its appearance, was at my friend Jess's apartment. It was an impromptu dinner. Her parents were in town and we all wanted to celebrate. She and her mom roasted a few chickens and whipped up some potatoes and green beans and I made some stuffing and this cake. Chocolate cake is not typical Thanksgiving fare, but Jess is gluten free, and so apple pie and pumpkin pie just wouldn't do. Besides we were already breaking tradition with our chickens we might as well throw a kink in it with chocolate, which really only makes sense considering we live in Switzerland.

Anyway back to my point about nine eggs. Jess's mom mom knew right away that there must be a lot of eggs in this cake. She is from Lima, Peru, and apparently there is a similar, traditional, cake made with eleven eggs. I'll have to try that one next.
Flourless Chocolate Cake
apparently this recipe is from the Macrina Bakery in Seattle Washington - that doesn't mean anything to me, but perhaps it will mean something to you.

* A note about the raspberries - I know, I know, they aren't in season right now and I almost skipped buying them, but then I found a little package for 2chf and grabbed them, and I'm so glad I did, they are essential. Don't skip them, hunt them down. Or print this recipe and save it for a summer day.

ingredients
- 10 oz/285 g bittersweet chocolate (about 65%)
- 9 eggs
- 12 tablespoons unsalted butter
- 3/4 cup granulated sugar
- 1/4 cup dark unsweetened cocoa powder, sifted
- 2 cups fresh raspberries
- powdered sugar (optional)

Preheat the oven to 350º F / 180º C. Butter a 9" springform pan.

You will need to set up a double-boiler to melt the chocolate so find a heat proof bowl (stainless steal or pyrex) that fits perched on top of a pot, without touching the bottom of the pot. Pour 2 inches of water in the bot, bring to a boil and then place your bowl on top of the pot, making sure it does not come in contact with the water. Put your roughly chopped chocolate into the bowl and stir gently until the chocolate has melted. Remove the bowl from the pot, and turn off the heat.

Separate the egg yolks from the whites, placing each in separate bowls. If you only have 1 mixer, like I do, then poor the whites into the bowl of your standing mixer and beat with the whisk attachment until medium-stiff peaks form. Scoop out this mixture into another bowl so that they will be ready to use and you can use your mixer. Clean out the bowl of your mixer.

Combine the butter and sugar in the bowl of your standing mixer fitted with the paddle attachment. Mix on low for a couple minutes and then turn to medium for five minutes, which will cream the butter. Once the mixture has lighten in color and texture add the egg yolks, two at a time, mixing entirely before adding more eggs. Then mix in the cocoa powder, mixing completely.

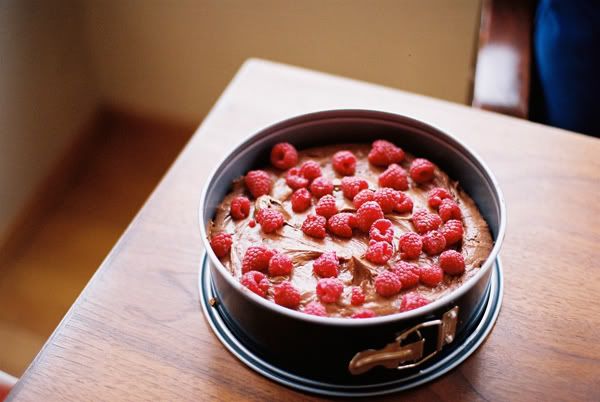
With a rubber spatula fold in the melted chocolate. Then slowly fold in the egg whites, making sure each scoop is incorporated before adding more. Keep stirring until you no longer see white streaks. Pour the batter into the spring form pan. Scatter 1 cup of raspberries over the top of the cake. Push the berries down into the batter, until you can't see them.

Place the pan in the oven and bake for 45 minutes. Take it out of the oven and let it cool on a wire rack for 30 minutes. The center will collapse, but don't worry, that's okay. If you want to use powdered sugar let the cake cool completely before sprinkling. Serve with the remaining raspberries.
This cake lingered in our kitchen, not because it's not amazingly good, but because it's the type of cake that you eat by the sliver. It's rich and fudge-y and as such is a cake to savor, not to devour. The fact that it seemed to get fudgier as the days went by and not hard and stale also added to it's lingering personality, which happens to be a well suited personality for a two-person home.

And how about that cat, almost floating on the porch railing?!

I hope you all have a nice weekend. Zach has surprised me with a road trip to Dijon. We had our hearts set on going to Paris this weekend to visit our friend Tala, but then the trains were sold out and the flights were expensive and at bad times. Ugh, but not to worry we are still going to Paris, just in a couple weeks and since we had had our hearts set on getting out of the city this weekend we are off for a little adventure.